


How to design an overvoltage protection circuit?

What does overvoltage protection mean? How to build an overvoltage protection circuit? One article will help you understand it all
1. What does overvoltage protection mean?
Overvoltage protection is a power supply function that cuts off the power supply when the input voltage exceeds a preset value. In order to prevent high voltage surges, some overvoltage protection methods are usually used.
Most power supplies use overvoltage protection circuitry to prevent damage to electronic components. The effects of overvoltage conditions vary from circuit to circuit, ranging from damaging components to degrading component performance and causing circuit failure or fire.
Power supplies can experience overvoltage conditions due to internal faults in the power supply or external causes such as distribution lines.
The magnitude and duration of overvoltage are some of the main considerations when designing effective protection. Protection involves setting a threshold voltage above which the control circuit will shut down the power supply or divert the extra voltage to another part of the circuit, such as a capacitor.
2. Overvoltage protection circuit
There are many methods for overvoltage protection. Here we mainly introduce the following ones:
2.1 Overvoltage protection circuit using Zener diode
2.2 Thyristor crowbar (SCR Crowbar) overvoltage protection circuit
2.3 Voltage clamp overvoltage protection
2.4 Voltage limitation
3. Overvoltage protection circuit using Zener diode
In overvoltage protection circuits using Zener diodes, Zener diodes and bipolar transistors are used for automatic overvoltage protection, which can be achieved in two ways:
• Zener voltage stabilizing circuit
This method regulates the input voltage and protects the circuit from overvoltage by providing a regulated voltage, but it does not disconnect the output section when the voltage exceeds the safe limit and will always receive an output less than or equal to the Zener diode rating. Voltage.
• Zener diode overvoltage protection circuit
In the second method of overvoltage protection, it disconnects the output section or load from the circuit whenever the input voltage exceeds a preset level.
3.1 How to protect circuits from overvoltage?
Consider the following diagram, we need overvoltage protection for a microcontroller. The microcontroller can be anything with a maximum 5V rating on the IO pins. Therefore, exceeding 5V may damage the microcontroller.

Overvoltage protection for microcontrollers
The Zener diode used in the above circuit is a 5.1V Zener diode. It will operate normally under overvoltage conditions. If the voltage is greater than 5.1V, the Zener diode will pass current and control the voltage up to 5.1V. But below 5.1V, the zener diode will act like a regular diode and block.
The figure below is a simulation of a Zener diode protection circuit.

Simulation of Zener Diode Protection Circuit
The schematic above has one input voltage, which is V1. R1 and D2 are the two components that protect the output from overvoltage. In this case, D2, 1N4099 is a 6.8V Zener diode. If V1 exceeds 6.8V, the output is protected. Due to the 1N4099's 6.8V reference voltage, the output will maintain a maximum of 6.8V.
Now see how the above circuit acts as a Zener diode input protection circuit and protects the output from voltages in excess of 6.8V.

Zener diode input protection circuit
During a 6V input voltage on V1, the output remains constant at 5.999V (or 6.0V).

Zener diode input protection circuit
In the above simulation, the input voltage is 6.8V. Therefore, the output is 6.785V, which is close to 6.8V. Let us further increase the input voltage and create an overvoltage condition.

Zener diode input protection circuit
Now, the input voltage is 7.5V, which is higher than 6.8V. The output is now still 6.883V. This is how the Zener diode effectively rescues the connected circuit from an overvoltage situation, and when the voltage returns below 6.8V, the circuit will operate normally again, as shown in the previous step. This means that, unlike fuses, Zener diodes will not be damaged even under overvoltage conditions.
In the above circuit, any other Zener diode with different values like 3.3V, 5.1V, 9.1V, 10.2V, etc. can be used to select different overvoltage margins.
3.2 Zener voltage regulator circuit
The Zener voltage regulator protects the circuit from overvoltage and regulates the input supply voltage. The circuit diagram for overvoltage protection using a Zener regulator is as follows:

Zener voltage stabilizing circuit
The preset voltage value of the circuit is the critical value at which the power supply is disconnected or no voltage higher than this value is allowed. The preset voltage value here is the rated value of the Zener diode. For example, if we use a 5.1V Zener diode, the output voltage will not exceed 5.1V.
When the output voltage increases, the base emitter voltage decreases due to the less conduction of transistor Q1. Due to the low conduction of Q1, it will reduce the output voltage, thereby maintaining a constant output voltage.
The output voltage is defined as:
VO=VZ - VBE
VO is the output voltage
VZ is the Zener breakdown voltage
VBE is the base emitter voltage

3.3 Overvoltage protection circuit using Zener diode
The overvoltage protection circuit diagram below is constructed using a Zener diode and a PNP transistor. This circuit disconnects the output when the voltage exceeds a preset level. The preset value is the rating of the Zener diode connected to the circuit. It is even possible to change the Zener diode based on the appropriate voltage value. The disadvantage of this circuit is that you may not find the exact value of the zener diode, so choose the closest rating to your preset.
1) Required materials
• FMMT718 PNP transistor – 2 pcs.
• Zener diode 5.1V (1N4740A) – 1nos.
• Resistors (1k, 2.2k and 6.8k) – 1 pc. (each)
•Breadboard
• Connect the wires
2) Overvoltage protection circuit

Overvoltage protection circuit diagram
3) Overvoltage protection principle
When the voltage is below a preset level, the base of Q2 is high and since it is a PNP transistor, it turns off. And, when Q2 is off, the base terminal of Q1 will be low, which allows current to flow through it.
Now, when the voltage exceeds the preset value, the Zener diode starts conducting, connecting the base of Q2 to ground and turning Q2 on. When Q2 conducts, the base terminal of Q1 goes high and Q1 conducts, which means Q1 acts as an open switch. Therefore, Q1 does not allow current to flow through it and protects the load from excess voltage.
Now we also need to consider the voltage drop across the transistor, which should be low to ensure the correct accuracy of the circuit. So we used FMMT718 PNP transistor which exhibits very low VCE saturation value and therefore the voltage drop across the transistor is very low.
3.4 How to choose a Zener diode for overvoltage protection?
The next important part is choosing the zener diode value. There are several main aspects:
1) Select the voltage of the Zener diode
This is the voltage value at which the Zener diode will act as a closed circuit and protect the load from overvoltage. For the example above, the zener voltage is 6.8V.
In some cases, the target Zener diode voltage is not available. In this case, a Zener diode close to the value can be chosen. For example, for overvoltage protection up to 7V, a 6.8V Zener diode is a close value.
2) Calculate the load current connected to both ends of the overvoltage protection circuit
For the example we discussed above, it was 50mA. In addition to load current, Zener diodes also require bias current. Therefore, the total current should be equal to the load current plus the Zener diode bias current. For the example discussed above, it could be
Total current = 50mA + 10mA = 60mA
3) Zener diodes have power ratings
Therefore, proper heat dissipation requires a properly rated power zener diode. The power rating can be calculated based on the total current (60mA) calculated in step-2. Therefore, the power rating of a Zener diode is equal to the voltage of the Zener diode, which is related to the total current flowing through the diode.
For our example above,
Power rating = 6.8V x 0.060 = 0.408 Watts.
Therefore, a 500mW Zener diode is sufficient.
4) Calculate the resistance value by differentiating the source voltage and the general voltage
The source voltage will be the maximum that can be applied to the circuit. For example, the maximum overvoltage that may occur or may be applied as a supply voltage may be 13V.
Therefore, the voltage drop across the resistor will be = 13V-6.8V = 6.2V According to Ohm's law, the resistor value will be = 6.2V / 0.060 A = 103R A standard value 100R resistor can be chosen.
4. Thyristor crowbar (SCR Crowbar) overvoltage protection circuit
As the name suggests, a crowbar circuit shorts the output of the power supply when an overvoltage condition occurs, which shorts the output line to ground.
Usually thyristors i.e. SCRs are used for this purpose as they can switch large currents and remain on until any charge dissipates. The thyristor can be connected back to a fuse which will blow and isolate the regulator from any further voltage.
4.1 Thyristor crowbar overvoltage protection circuit

Thyristor crowbar overvoltage protection circuit
4.2 Thyristor crowbar overvoltage protection principle
In this state, no current flows through the Zener diode because its breakdown voltage has not been reached, and no current flows into the gate of the thyristor and remains off. The power supply will work normally. If the series pass transistor in the power supply fails, the voltage will start to rise - decoupling in the unit will ensure that it doesn't rise immediately.
As it rises, it will rise above the point where the Zener diode begins to conduct, and current will flow into the gate of the thyristor, causing it to fire. When a thyristor fires, it shorts the output of the power supply to ground to prevent damage to the circuit it powers.
This short circuit can also be used to blow a fuse or other component, cutting power to the voltage regulator and saving the equipment from further damage.
It is common to place some decoupling in the form of a small capacitor between the gate of the thyristor and ground to prevent sharp transients or RF from the unit being powered from entering the gate connection and causing parasitic triggering. However, this capacitor should not be made too large as it may slow down the start-up of the circuit in the event of an actual fault, and the protection may be too slow.
4.3 Notes on thyristor Crowbar overvoltage protection:
Thyristor or SCR, silicon controlled rectifier can be used to provide overvoltage protection in power circuits. By detecting high voltage, the circuit can trigger the thyristor to set a short circuit or shunt on the voltage rail to ensure it does not rise to high voltage.
5. Voltage clamp overvoltage protection
Another very simple form of overvoltage protection uses a method called voltage clamping. In its simplest form, it can be provided by using a Zener diode placed at the output of a regulated power supply.
Choose a zener diode voltage slightly above the maximum rail voltage, which will not conduct under normal conditions. If the voltage rises too high, it will start to conduct, clamping the voltage to a value slightly above the rail voltage.
If a regulated power supply requires higher current capability, a Zener diode with a transistor buffer can be used. This will increase the current capability of the simple Zener diode circuit by a factor equal to the current gain of the transistor. Since this circuit requires power transistors, the current gain level may be lower - perhaps 20 - 50.
 - Simple Zener Diode, (b) - Higher Current with Transistor Buffer")
Zener Diode Overvoltage Clamp (a) - Simple Zener Diode, (b) - Higher Current with Transistor Buffer
Articles you may also like
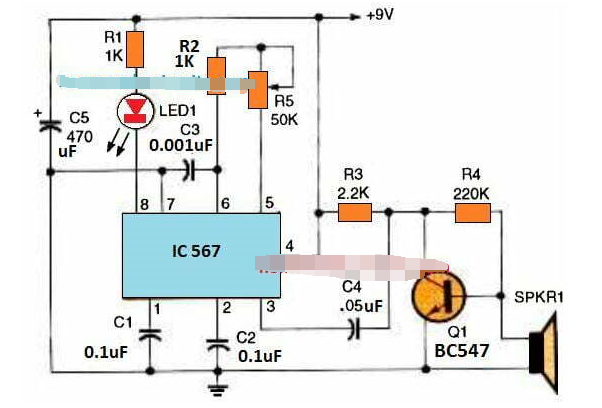
Simple and Useful Ultrasonic Transmitter and Receiver Circuit

The working principle and usage method of TTL circuit

Automotive taillight control circuit design
Interpret the 1N4007 Datasheet to understand what Schottky diode are

-

-

-

-

-

-

-

-

stmicroelectronics
ARM® Cortex®-M0+ STM32G0 Microcontroller IC 32-Bit Single-Core 64MHz 128KB (128K x 8) FLASH 48-UFQFPN (7x7)
-
