


- Startseite
- Blogs
- Power management
- DC-DC elements of layout (2)
DC-DC elements of layout (2)
The DC-DC inductor is a unique device that continuously stores and discharges energy during operation and stimulates an electromagnetic field. On the one hand, it emits electromagnetic radiation into space, and on the other, it conducts along the power line. Consequently, the selection and architecture of DC-DC inductors are crucial. This section describes briefly the layout and wiring specifications of inductors (portal: DC-DC-23: DC-DC layout and wiring points-1).
1.The design of the inductor
Place the inductor as near to the IC as possible to reduce the switching node's radiated noise, and avoid using excessively wide wiring. There may be reasons to increase the copper foil area at the inductor pad in order to reduce the impedance of the trace or increase the heat dissipation area, but a copper foil that is too large may result in antenna effects and increased electromagnetic interference.
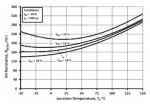
The capability to withstand current is one of the factors that determine the wiring girth. Figure 24-1 is a graph of the width of a conductor and the temperature increase caused by self-heating when a certain current flows. For instance, when a current of 2A travels through a wiring with a plating thickness of 35m, a wiring with a width of 0.53mm can be used to control the temperature rise at 20°C. However, since the width of the wiring is affected by the heat generated by the adjacent components and the ambient temperature, it is advised to leave a sufficient margin. It is recommended, for instance, that the wiring width per 1A current capability on a 1 ounce (1OZ) (35m) copper thick PCB board be greater than 1mm, and that the wiring width per 1A current capability on a 2 ounce (70m) copper thick PCB board be greater than 0.7mm.

Figure 24-1 is temperature increase caused by plating thickness, wire breadth, and current.
Figure 24-2 depicts the layout considering the recommended wiring area from the perspective of EMI:

Figure 24-2 is the optimal inductor design
Figure 24-3 depicts an improper electrical layout with excessively wide traces, which may result in antenna effects and an increase in electromagnetic interference.

Diagram 24-3: Defective inductor wiring area of copper foil is too large
It is forbidden to connect GND directly to the inductor. Due to the eddy current generated by the GND layer, the magnetic field lines may be eliminated, resulting in a reduction in inductance or an increase in loss (a reduction in Q value). Due to the risk of eddy currents transmitting switching noise to signal lines other than GND, direct routing beneath the inductor should be avoided. When routing signal lines, please use a closed magnetic circuit inductance with less leakage flux, and after actual testing, determine if there is a problem. In addition, when wiring inductors, the distance between the terminals must be considered.

Figure 24-4: Poor Routing Immediately Below the Inductor
As depicted in Figure 24-5, when leads are routed to pins that are too close together, high frequency signals at the switch node can be conveyed to the output via stray capacitance.

Figure 24-5: Poor Routing Immediately Below the Inductor
2.The output capacitor is positioned near the inductor.
By connecting an output capacitor in parallel at the output end of the buck converter circuit, the output current is stabilized. Although the output capacitor is less significant than the input capacitor, it should be placed as close to the inductor as feasible.
Since there are hundreds of megahertz of high-frequency signals on the input ground, it is advised that the ground wires of Cout and CIN be 1 to 2 centimeters apart. If they are too near, high-frequency input noise may be transmitted via Cin to the output.
3. Connecting the feedback cable
In signal wiring, the cabling of the feedback signal also requires special care. If noise is introduced into the error amplifier, output voltage errors and, in certain circumstances, oscillations and loop instability may occur. Why can't the DC-DC voltage divider resistor be chosen at random? (Portal: DC-DC-17)
Figure 24-6 illustrates design considerations for the path of feedback.
3.1This pin and the voltage-dividing node of the resistor voltage-dividing circuit should be connected by a short wire because the FB pin of the IC that inputs the feedback signal typically has a high-impedance design.
3.2The sampling point for detecting the output voltage should be connected to both ends of the output capacitor, or it should be located after the output capacitor.
3.3The noise tolerance will be considerably enhanced if the wiring of the resistor divider circuit is parallel and close to the wiring of the output power supply.
3.4: The wiring should be far from the switching node of the inductor and the freewheeling diode, and care should be taken not to wire directly under the inductor or the freewheeling diode or in parallel directions; the same considerations should be applied to multilayer circuit boards.

Considerations for Feedback Path Layout, Diagram 24-6

Figure 24-7: Connections for Extra Feedback Paths
In the circuit depicted in Figure 24-7, the ground wire's parasitic resistance will cause a voltage drop, which will influence the load regulation characteristics. Figure 24-8 depicts a layout in which the wiring of the feedback path is transmitted to the bottom layer through vias, away from the switch node, if the voltage fluctuation meets the design specifications.

Figure 24-8: Layout Illustration of Bottom Trace Feedback Path
The feedback path is parallel to the inductor in Figure 24-9, and the magnetic field generated around the inductor will induce noise on the feedback path.

Figure 24-9: Incorrect Feedback Path Routing Next to the Inductor
4.Grounding
The analog small signal ground and power ground must be separated, as shown in Figure 29-10. In theory, PGND and AGND are placed adjacently on the upper layer:

Figure 29-10 depicts the PGND and AGND. Recommended Arrangement
If the divided PGND is connected on the backside or inner layer through a via, as depicted in Figure 24-11, the parasitic resistance and parasitic inductance of the via may cause increased loss and noise degradation. Setting the ground layer on the back and the inner layer is primarily intended to reduce DC loss, shielding, and heat dissipation; the GND path serves only an auxiliary function.
When placing the ground layer on the inner or bottom layer of a multilayer circuit board, it is necessary to pay close attention to the connection with the power ground of the input terminal with higher switching noise and the ground of the freewheeling diode.

Figure 24-11: Power foundation layout
For the GND processing of multilayer circuit boards, as shown in Figure 24-12, when the PGND layer used to reduce DC loss is installed on the second layer, more vias should be used to connect the PGND on the top layer to the PGND on the second layer in order to reduce the parasitic inductance on PGND. Moreover, when there is a common ground on layer 3 and SGND on layer 4, the connection between PGND and the ground on layers 3 and 4 can be positioned closer to the output capacitor with less high-frequency switching noise. Connecting the input terminal with more noise and PGND close to the freewheeling diode should be avoided.

Figure 24-12 illustrates the power ground connection method for multilayer printed circuit boards.
)
Articles you may also like
Principles and applications of LDO

Working principle of field Mosfet transistor triode
Basic knowledge and working principle of AC to DC converter
A Method for Optimizing the Gate Drive of SiC MOSFETs

-

-

-

-

-

-

-

-

-

omron-electronics-inc-emc-div
General Purpose Relay DPDT (2 Form C) 24VDC Coil Through Hole